How to digitize photos
Method post published onProblem statement
You have one or more physical photographs, maybe an album, and you would like to turn them into digital files. The end goal could be to publish them online, back them up digitally, or send them to someone over the Internet.
Solution
I propose a method based solely on command line tools, including the great ImageMagick image editing program. This approach works very well because you can (a) craft complex image manipulation commands in a compact form, easily run them by copying them into the console as needed, and save them for later; (b) run the workflow you created on many images at once, making it a breeze to process a whole album.
Prerequisites
The method presented below makes use of the following:
- A scanner. I will be using a Xerox WorkCentre 3025;
- The
scanimagetool provided by SANE. This is our interface with the scanner device and will generate the initial image file. Setting up the connection to the scanner is not in the scope of this article. If you need assistance with that, you can check out the article on ArchWiki; - ImageMagick, a CLI (command line interface) image editor. We will use it to process the image file generated by SANE.
You also need at least a basic understanding of how to use command line programs in a shell like Bash or Zsh.
Part I: Digitise a single photo
First, I will show you the process for a single photo, building up a complex command pipeline step by step. In the second part, we'll see how to batch scan and process multiple photos.
Step I.1: Scan the photo
Getting the initial image file from the scanner is very simple, and should work with this command:
scanimage --output-file='photo.pnm'
Now, every scanner has various options that you can pass via scanimage. For
instance, mine has the option --scan-intent Photo, but I couldn't notice any
difference when using it. Therefore, I recommend you just use the basic command
above, but if you're curious, run scanimage -A to see all the option
available.
The output format is PNM, which is a raw, uncompressed image format. It's also fine to start with lossless formats like PNG. Once he are happy with the result, we will convert the image to JPEG.
Step I.2: Trim the image
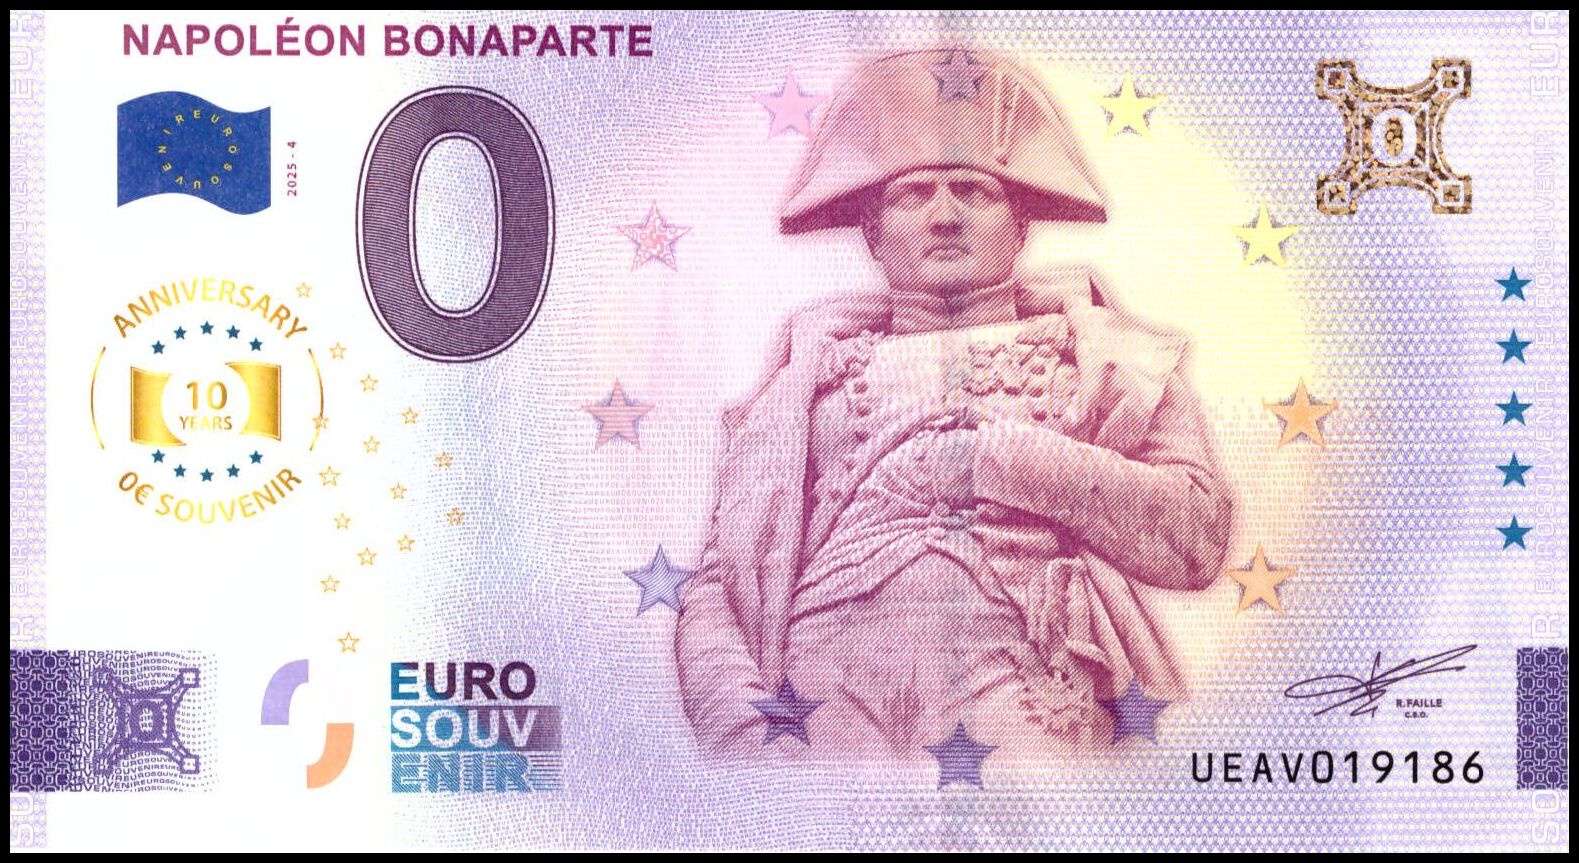
This is the resulting image fresh from the scanner (I chose a Napoleon 0€ souvenir banknote as the sample for this post):

You can see that the result of the scan has the size of an A4 sheet. What is not as visible is that the scanner added a white border around the resulting image. You can see it if you focus on the upper left corner. In any case, we have to remove all the empty space. This is done like so:
magick photo.pnm -fuzz 15% -trim photo-trim.pnmThe "fuzz" percentage above can be tweaked according to the results you get. The more noisy or grainy the initial image is (e.g. due to dust or imperfections on the scanner bed or background), the bigger this percentage has to be. In my case, 15% worked fine, but 10% would only trim part of the white space.1
Step I.3 (optional): More trimming
After the fuzzy trim, the image might look good already. This is true for our example above. However, in some cases (especially with darker photos) we are left with very small but still visible white edges. This happens because the scanned item can never be placed perfectly square on the bed of the scanner. Furthermore, the scanner itself might have a slight misalignment, or the item might move when lowering the lid. You can see this in the following example:

The quick and easy option here is to use the shave operation, like so:
magick photo-trim.pnm -shave 10x5 photo-trim-shave.pnmThis example command will "shave" off 10 pixels from the left and right edges, and 5 pixels from the top and bottom edges. In the unlikely scenario where you want to remove a different amount from each edge, things are a little more complicated. In the example below, one trim and four chop operations are combined to achieve a fine-grained control over the final result.
  magick photo.pnm -fuzz 15% -trim +repage \
      -gravity East -chop 5x0 \
      -gravity South -chop 0x8 \
      -gravity West -chop 4x0 \
      -gravity North -chop 0x15 \
photo-trim-chop.pnm+repage option is needed to reset the coordinates after the trim.
Step I.4: Converting and resizing to the final dimensions
The last thing we need to do is to resize and format the image according to the intended use. For instance, my blog currently has its content laid in a column 768 pixels wide, so it makes sense to use this size, unless I want to leave my readers the option to open the image in its full size. For archival purposes, I would keep the files closer to their original size so as to not lose too much accuracy and detail. As for the format, JPEG offers great compression-to-quality ratios according to your needs:
  magick photo-trim-shave.pnm -resize 768 \
      -quality 80 -interlace JPEG -format jpg \
      photo-trim-shave.jpg
The number passed to the -quality option is a percentage, so 100 is the
highest quality, but also the biggest file size. You can try different values
and choose the best one depending on what compromises are you willing to make in
order to have a smaller file size.
To summarize, here is a complex magick command that will perform all the
processing steps we described, all at once.
  magick photo.pnm \
         -fuzz 15% -trim +repage \
         -shave 10x10 \
         -resize 768 \
         -quality 80 -interlace JPEG -format jpg \
         photo.jpg
Part II: Digitise a batch of photos
Step II.1: Scanning the photos
To help you with scanning multiple photos or documents, scanimage offers very
useful options:
scanimage --batch='photo-%d.pnm' --batch-prompt --source Flatbed
This command will produce files named photo-1.pnm, photo-2.pnm, and so on,
for as many scans you make. Before each scan, you can take your time to position
the photo on the glass bed, then lower the lid and press ENTER to start the
scan. When you have finished all the photos, press Ctrl+D to signal the end of
the batch. You might not need the --source Flatbed argument if you only have a
basic scanner. My scanner also has an automatic document feeder, which is the
default source for batch scanning, and this is why I need to specify the flatbed
explicitly.
I suggest that you don't mix in a batch photos with different characteristics. If some images will differ too much from the rest, they might require special processing. For instance, I have some photos printed on paper that is bigger than the photo itself, and so they have white margins that have to be removed. These should not be mixed with photos that occupy the whole paper sheet.
Step II.2: Batch processing
Issuing the same command over a series of files is a rather general problem, so
I won't go into details here. Essentially, we ruse the same commands as presented
in Part I while making use of the shell's for loops, which looks like this:
  # Inline (compact) "for" loop
  for f in *.pnm; do magick "$f" -quality 90 "${f%.pnm}.jpg"; done

  # Multiline "for" loop
  for f in photo-*.pnm; do \
    magick $f -fuzz 15% -trim +repage \
      -gravity East -chop 10x0 \
      -gravity South -chop 0x10 \
      -gravity West -chop 10x0 \
      -gravity North -chop 0x10 \
      trimmed/$f
  done
In the first example, we operate on every file ending in .pnm in the current
directory, and we put the output in a file of the same name, but with its
extension changed to .jpg (this is what the ${f%.pnm}.jpg does).2
The second example is what we might use for the files scanned in Step 1. The
photo-*.pnm pattern will only match files like photo-1.pnm or
photo-123-abc.pnm, so you reduce the chances of accidentally editing wrong
files. Note that the output files are created in a subfolder called "trimmed"
— useful to avoid cluttering the main subfolder.
Remarks
- One efficiency improvement that could be made is to scan two or more photos at once, assuming they fit in the scanner side by side. You could reduce drastically the scanning step, but then you would need an intermediary step to separate the raw image into one image per photo. Unless one has a huge number of items to digitize, I don't think it's worth it to complicate the matter.
- Many of the commands used in this article can be adapted or extended for other use cases, like scanning documents.
Check out the ImageMagick documentation for more information about available operations and options.
Related articles